Adding Wi-Fi Printing for “Dumb” Printers
Printers are terrible. And yet, there are few contenders stepping up to fill the void. After struggling with junky software, upsells, ads, subscriptions, and broken printers again and again, I gave up and turned to the dumbest possible printer I could find: Brother HL-L2300D black and white laser printer.
I’ve been using this same Brother BW laser for 5 years, and it works great. No screen. No networking. It just prints fast and reliably. But, I’ll admit that wireless printing is pretty nice, especially for my wife who prints more than me.
And 2 years ago, I thought: how hard could it be? I had a spare Raspberry Pi 2B lying around and gave it a shot. It’s been running ever since with no attention needed, again reliable and simple.
In fact it’s been so reliable, that when I went to upgrade the OS recently, I realized I had lost the credentials. So, I had to retrace my steps to re-install the full setup from scratch. And I thought I’d share my notes in case anyone else was looking for a hassle free wireless printing experience.
What You Need§
- A “dumb” USB printer
- I use the Brother HL-L2300D, but any USB printer works
- A Computer, ideally a small Single Board Computer (SBC)
- I used a Raspberry Pi 2B, but anything that runs Linux will work.
- A MicroSD card for the OS
- A USB cable to connect the printer to the SBC
- A Power cable to power the SBC
- Your home network
- Ethernet recommended for the Pi
Step 1: Flash Ubuntu Server§
Download Ubuntu Server 24.04 LTS for Raspberry Pi and flash it to a MicroSD card with Balena Etcher.
Then, boot the Pi for the first time:
- Insert the MicroSD card
- Connect HDMI, keyboard, and power
- Connect Ethernet to your network
- Login with the default credentials (username:
ubuntu, password:ubuntu) - Upgrade packages:
sudo apt update && sudo apt upgrade
Step 2: Set Up SSH§
You’ll want to manage the Pi headlessly so you can put it anywhere the printer is. No need to keep a keyboard and monitor attached.
First, find the Pi’s IP address:
ip addr | grep 192.168
# Look for your Ethernet IP, ex: 192.168.1.154
# In rare cases, your home network might use another net block like 10.0.0.0/32 or 172.16.0.0/12
Now, from your laptop, generate a key and copy it to the Pi:
# Generate a key (replace my-computer with a more descriptive comment for your key)
ssh-keygen -a 100 -t ed25519 -C my-computer -f ~/.ssh/id_printer_ed25519

# Copy the key to the Pi. Below I describe a janky way of getting your key over
# using HTTP server logging. But you can also use magic-wormhole or temporarily
# enabling password auth and then disabling later.
#
# On the Pi, start a temporary HTTP server:
python3 -m http.server --bind 0.0.0.0 8000 2>&1 | tee log.txt

# From your laptop, upload the public key:
curl -X PUT -T ~/.ssh/id_printer_ed25519_2026-03-07.pub http://192.168.1.154:8000/mykey

# On the Pi, quit the HTTP server (Ctrl+C), then add the key:
mkdir -p ~/.ssh
cat log.txt | grep "PUT /mykey" | awk '{print $NF}' >> ~/.ssh/authorized_keys
Add the SSH alias to your laptop’s ~/.ssh/config:
#file:~/.ssh/config
Host rpi-printer
    User ubuntu
    HostName 192.168.1.154
    IdentityFile ~/.ssh/id_printer_ed25519
Test that it works:
ssh rpi-printer
Once you’ve confirmed SSH key login works, you’re done with SSH setup and can disconnect the keyboard and monitor.
Step 3: Enable Auto-Login§
Since this Pi is only running a print queue, you want it to come back up on its own after power outages and other disruptions. Enable auto-login by editing the getty service:
sudo vim /lib/systemd/system/getty@.service
Replace this line:
# Old
ExecStart=-/sbin/agetty -o '-p -- \u' --noclear %I $TERM
With this:
# New
ExecStart=-/sbin/agetty --noissue --autologin ubuntu %I $TERM Type=idle
Here ubuntu is the username. If you use a different username, change it
accordingly.
Then reboot and hope it worked:
sudo reboot
If the SSH server isn’t reachable on the network after reboot, reconnect the keyboard and monitor and dive in to figure out what the issue was.
Step 4: Install CUPS and Configure the Printer§
CUPS is the open source print server that handles everything: print queues, drivers, the web UI, and so on.
Install and enable CUPS:
sudo apt install cups
sudo systemctl start cups
sudo systemctl enable cups
Now configure CUPS to allow remote access and printer sharing. Edit the config:
sudo vim /etc/cups/cupsd.conf
Make these changes:
- Enable printer sharing: Change
Browsing NotoBrowsing Yes - Allow remote printing: Change
Listen localhost:631toListen 0.0.0.0:631 - Allow remote web UI access: Update the
<Location />and<Location /admin>blocks:
# Old
<Location />
  Order allow,deny
</Location>
<Location /admin>
  Order allow,deny
</Location>

# New
<Location />
  Order allow,deny
  Allow @LOCAL
</Location>
<Location /admin>
  Order allow,deny
  Allow @LOCAL
</Location>
Add your user to the lpadmin group so you can login to the CUPS web UI:
sudo usermod -aG lpadmin ubuntu
Install the printer driver. For the Brother HL-L2300D:
sudo apt install printer-driver-brlaser
Restart CUPS to pick up all the changes:
sudo systemctl restart cups
Now visit the CUPS web UI in your browser. You’ll need to use HTTPS because the login page requires it:
https://192.168.1.154:631/
Your browser will warn you about the self-signed certificate. That’s fine, proceed through it.
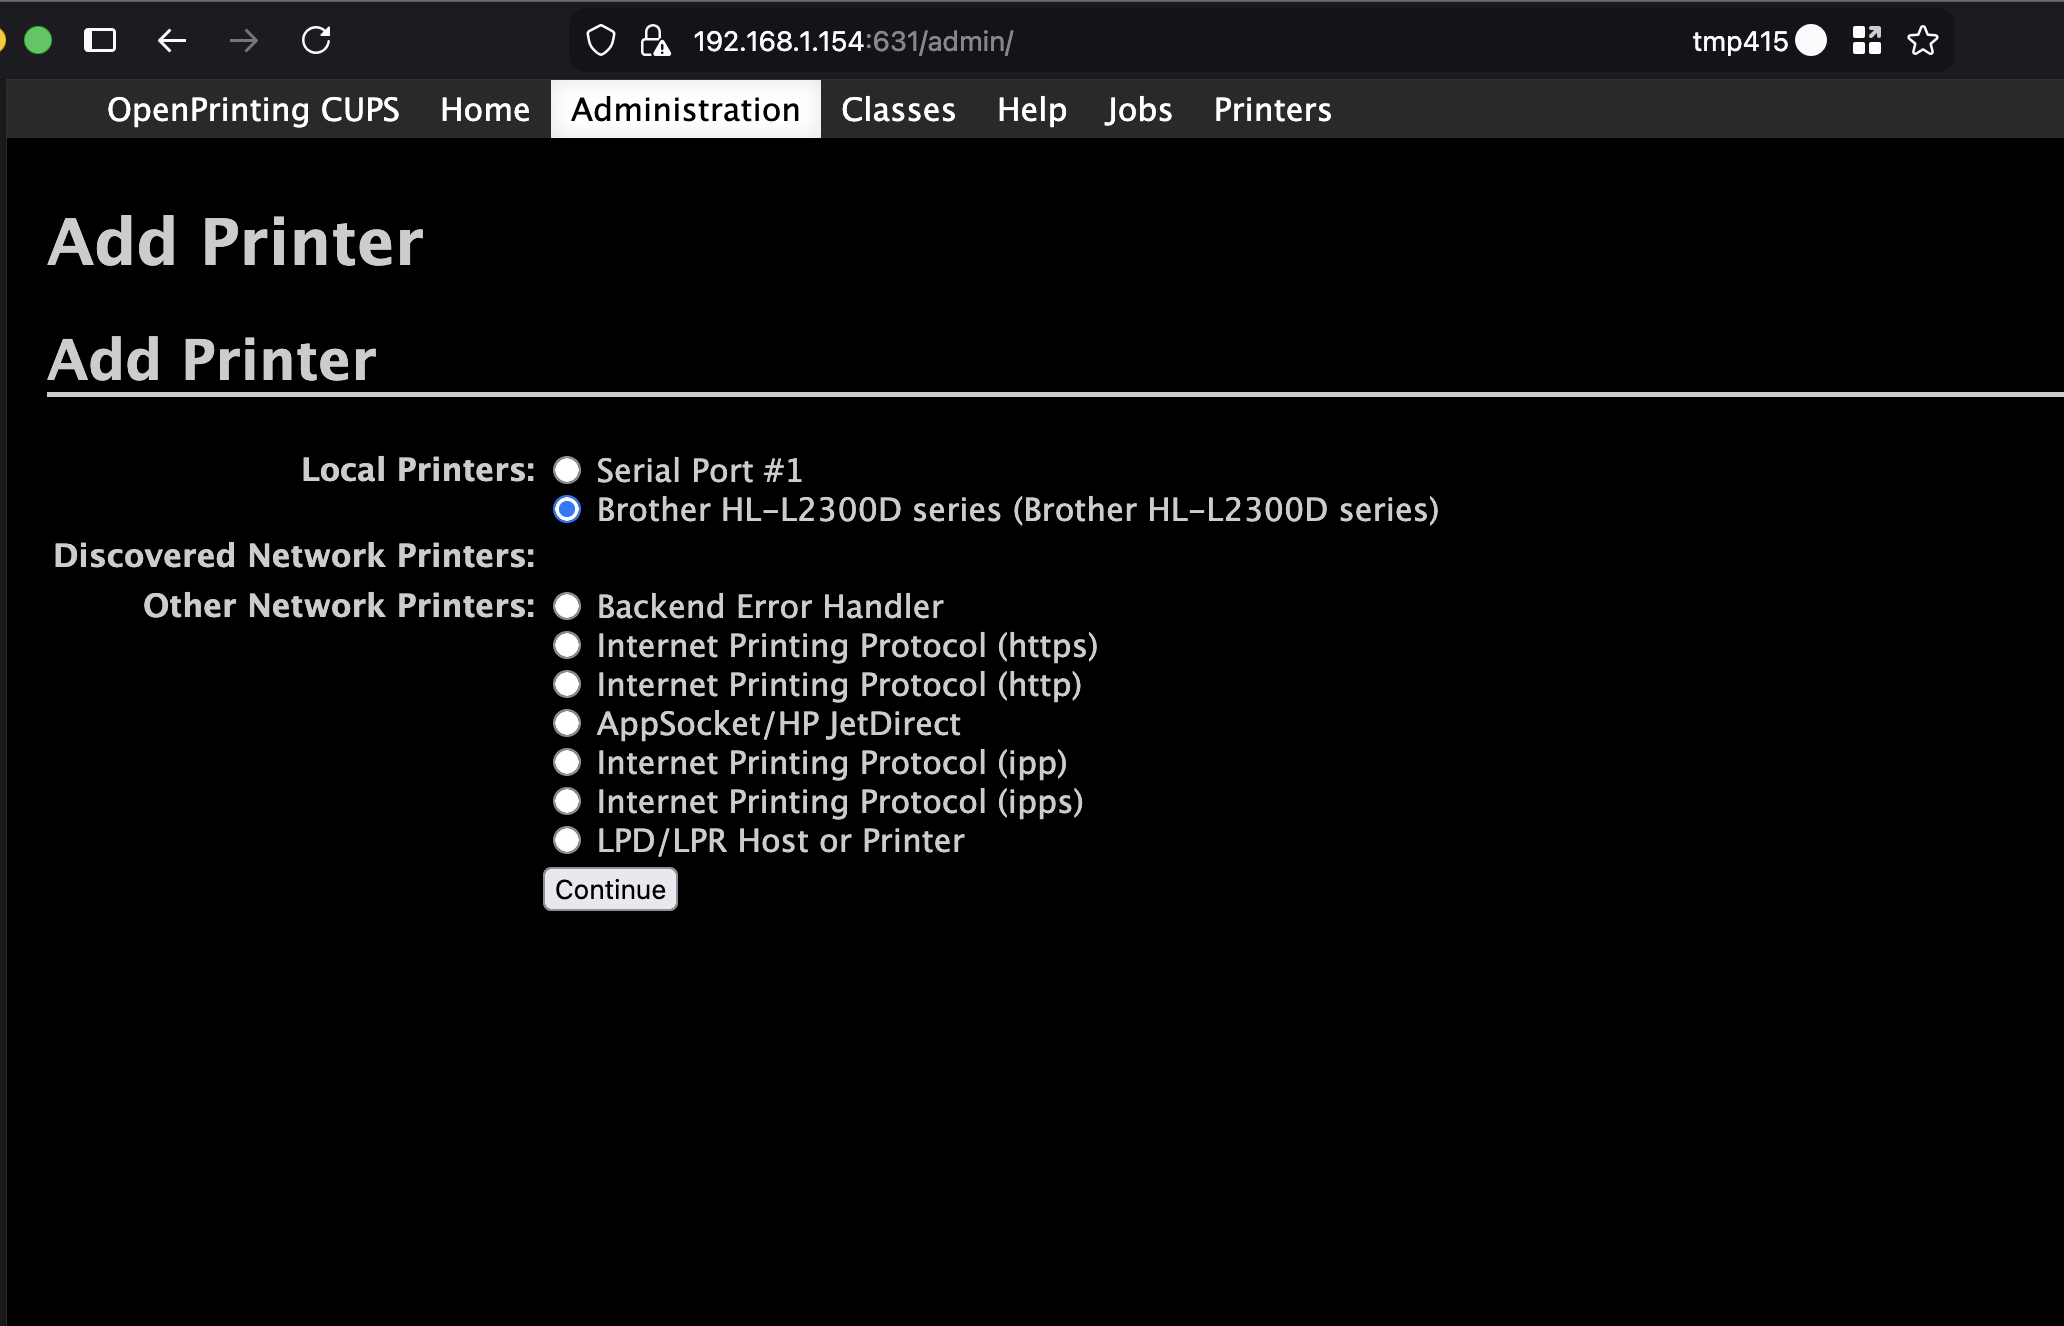
Step 5: Add the Printer in CUPS§
Navigate to the Administration tab and click Add Printer.
The printer should show up automatically since we already installed the driver. Follow the prompts to add it.
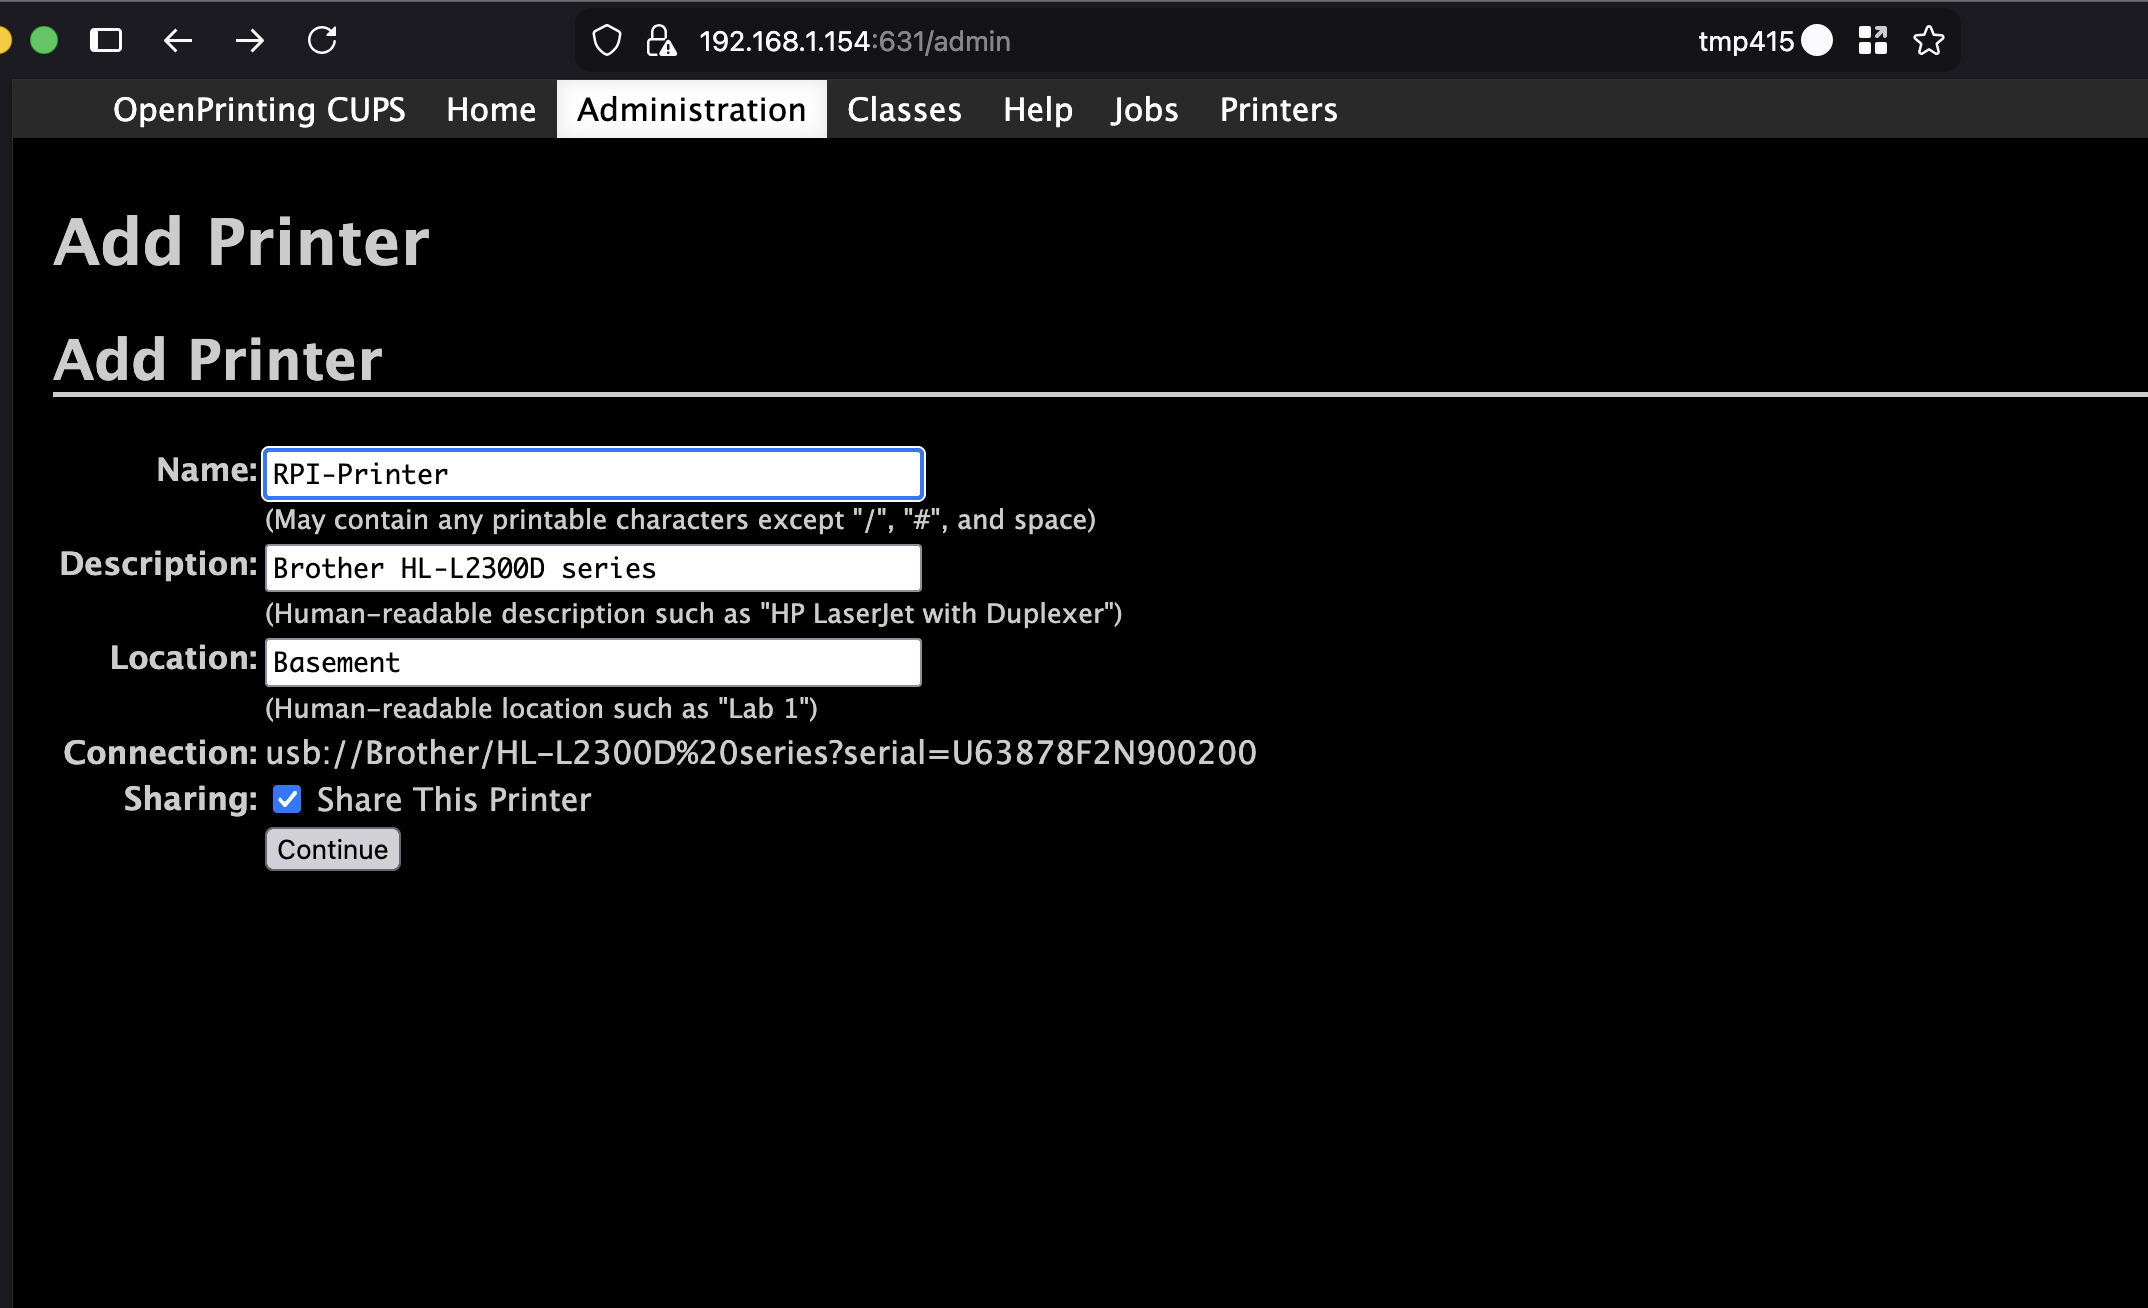
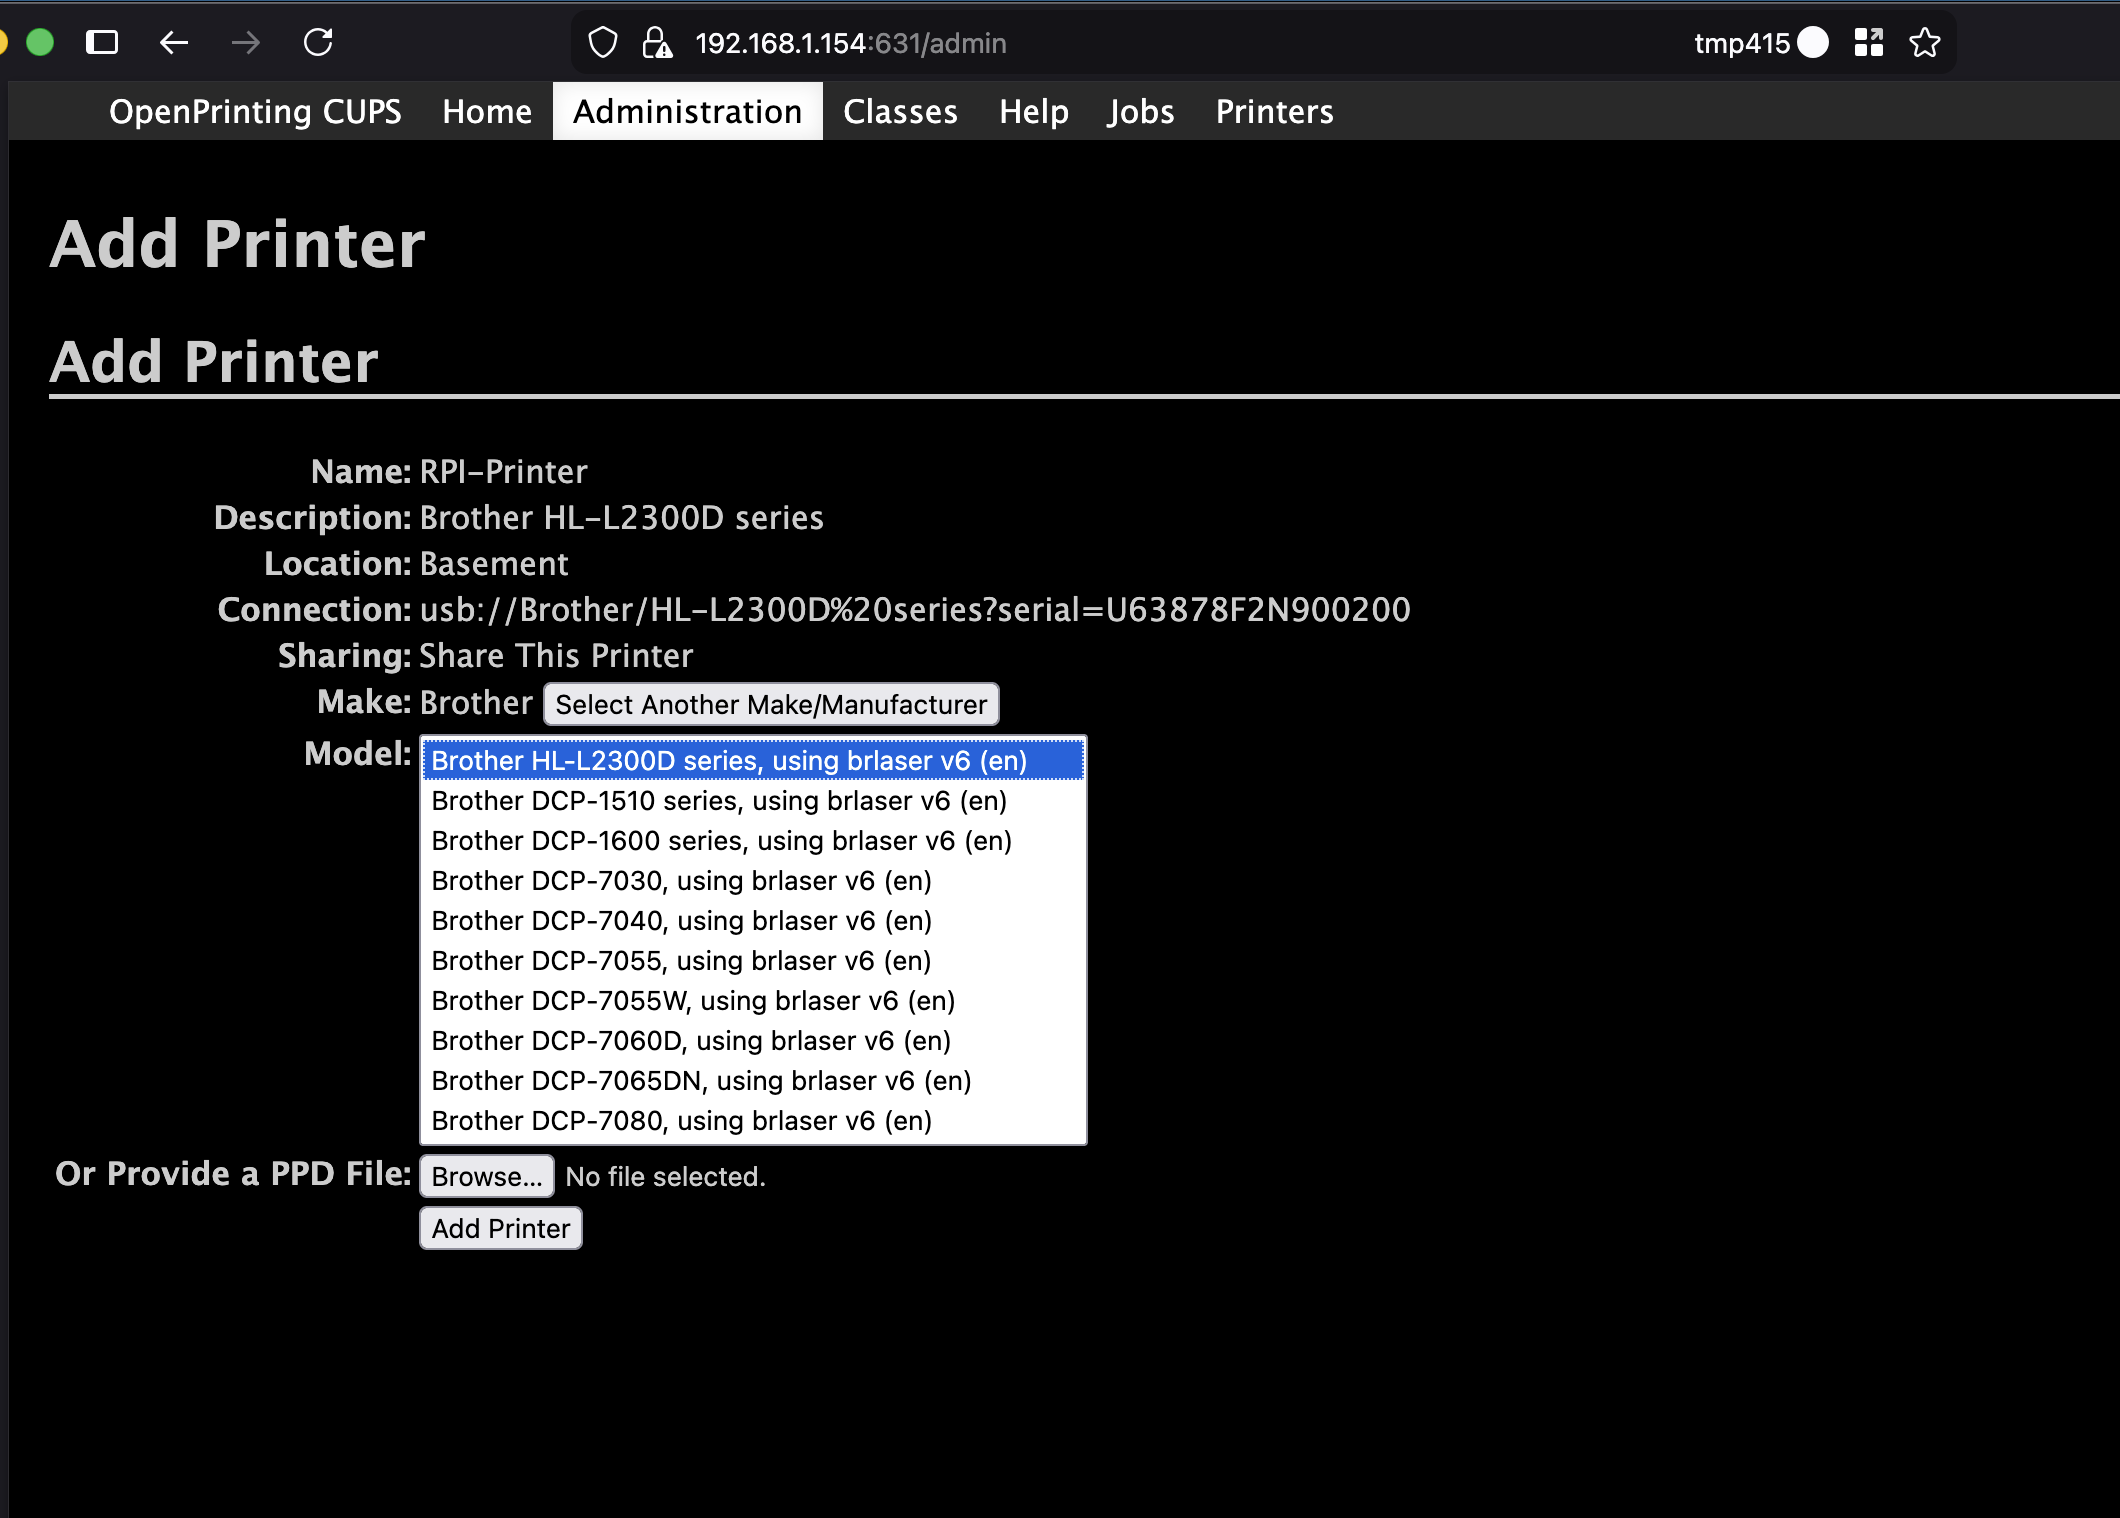
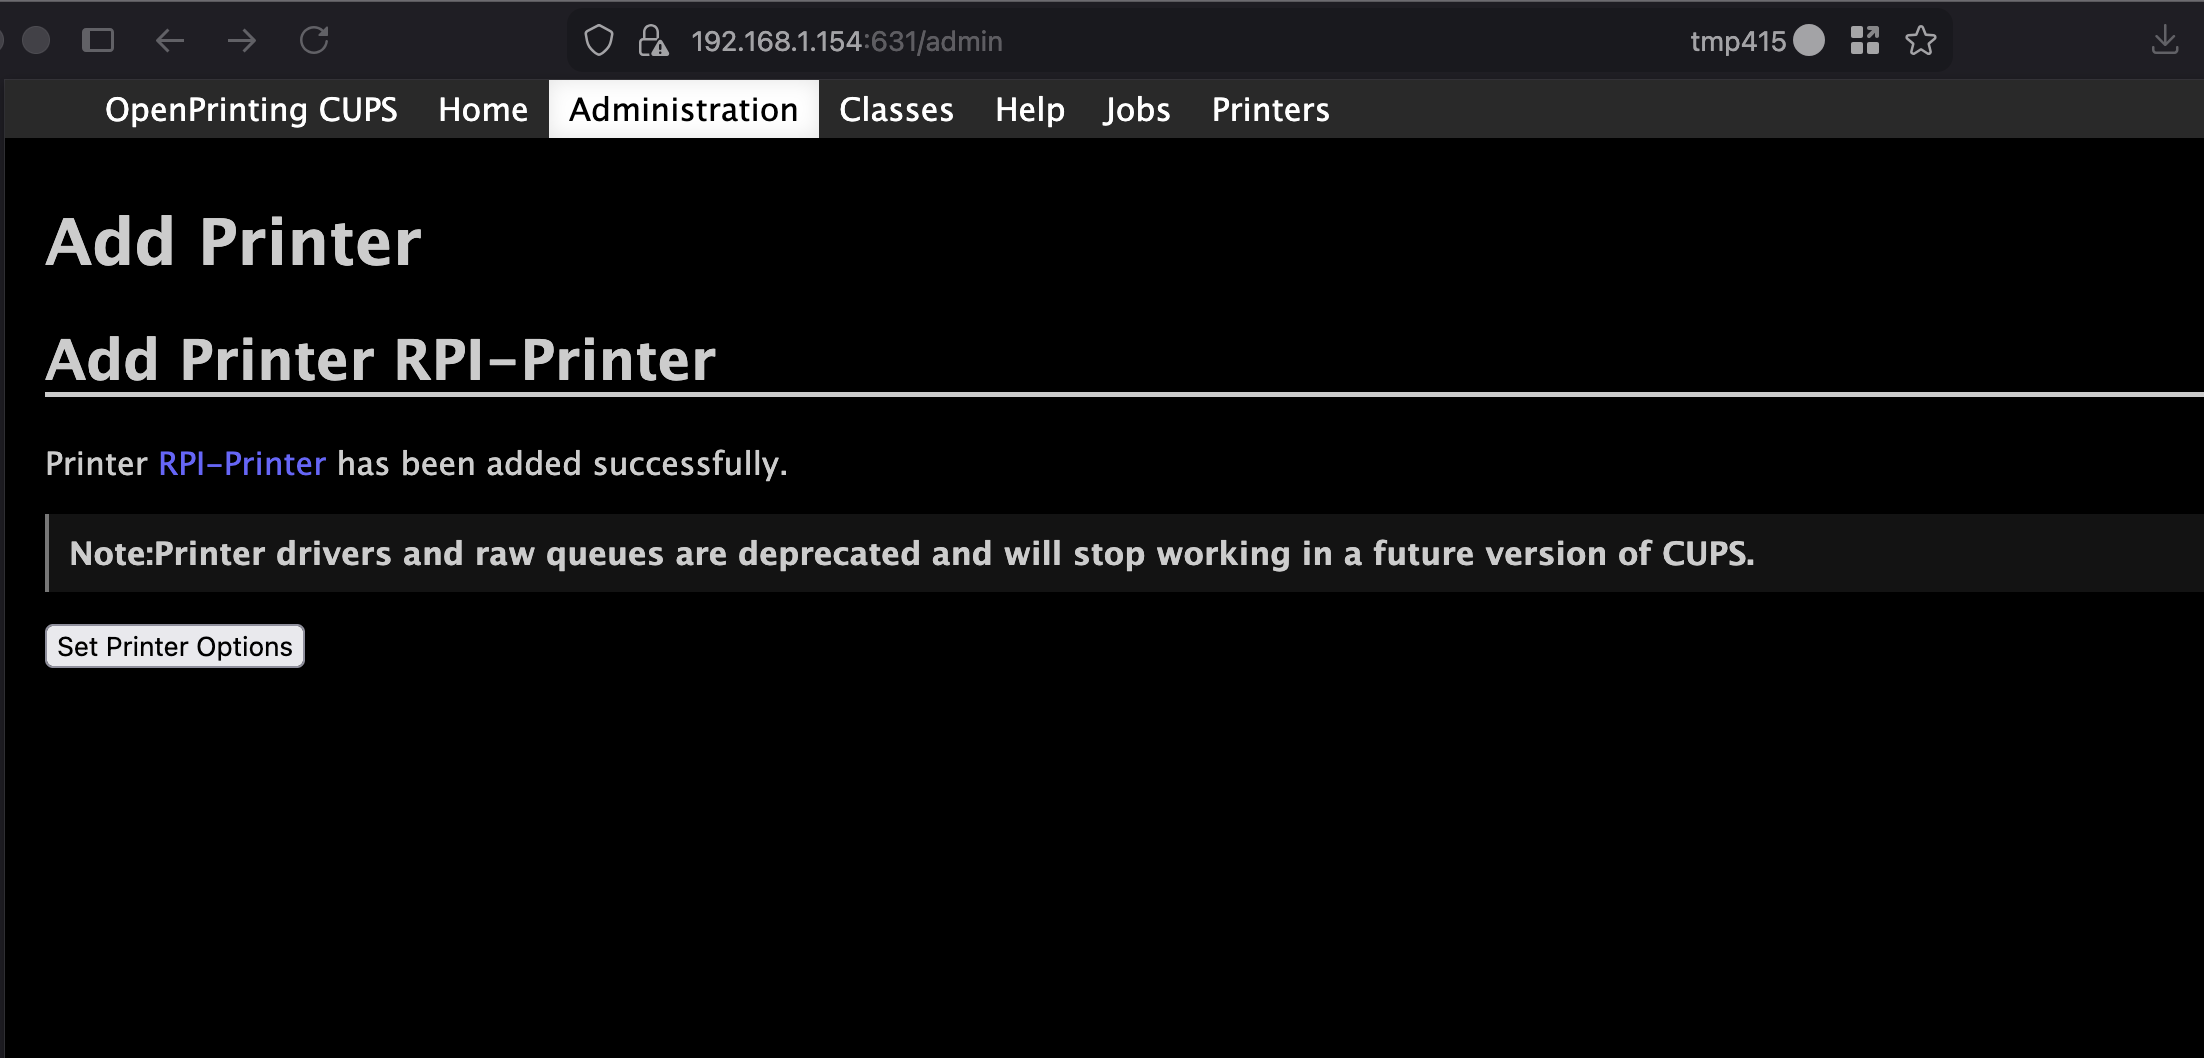
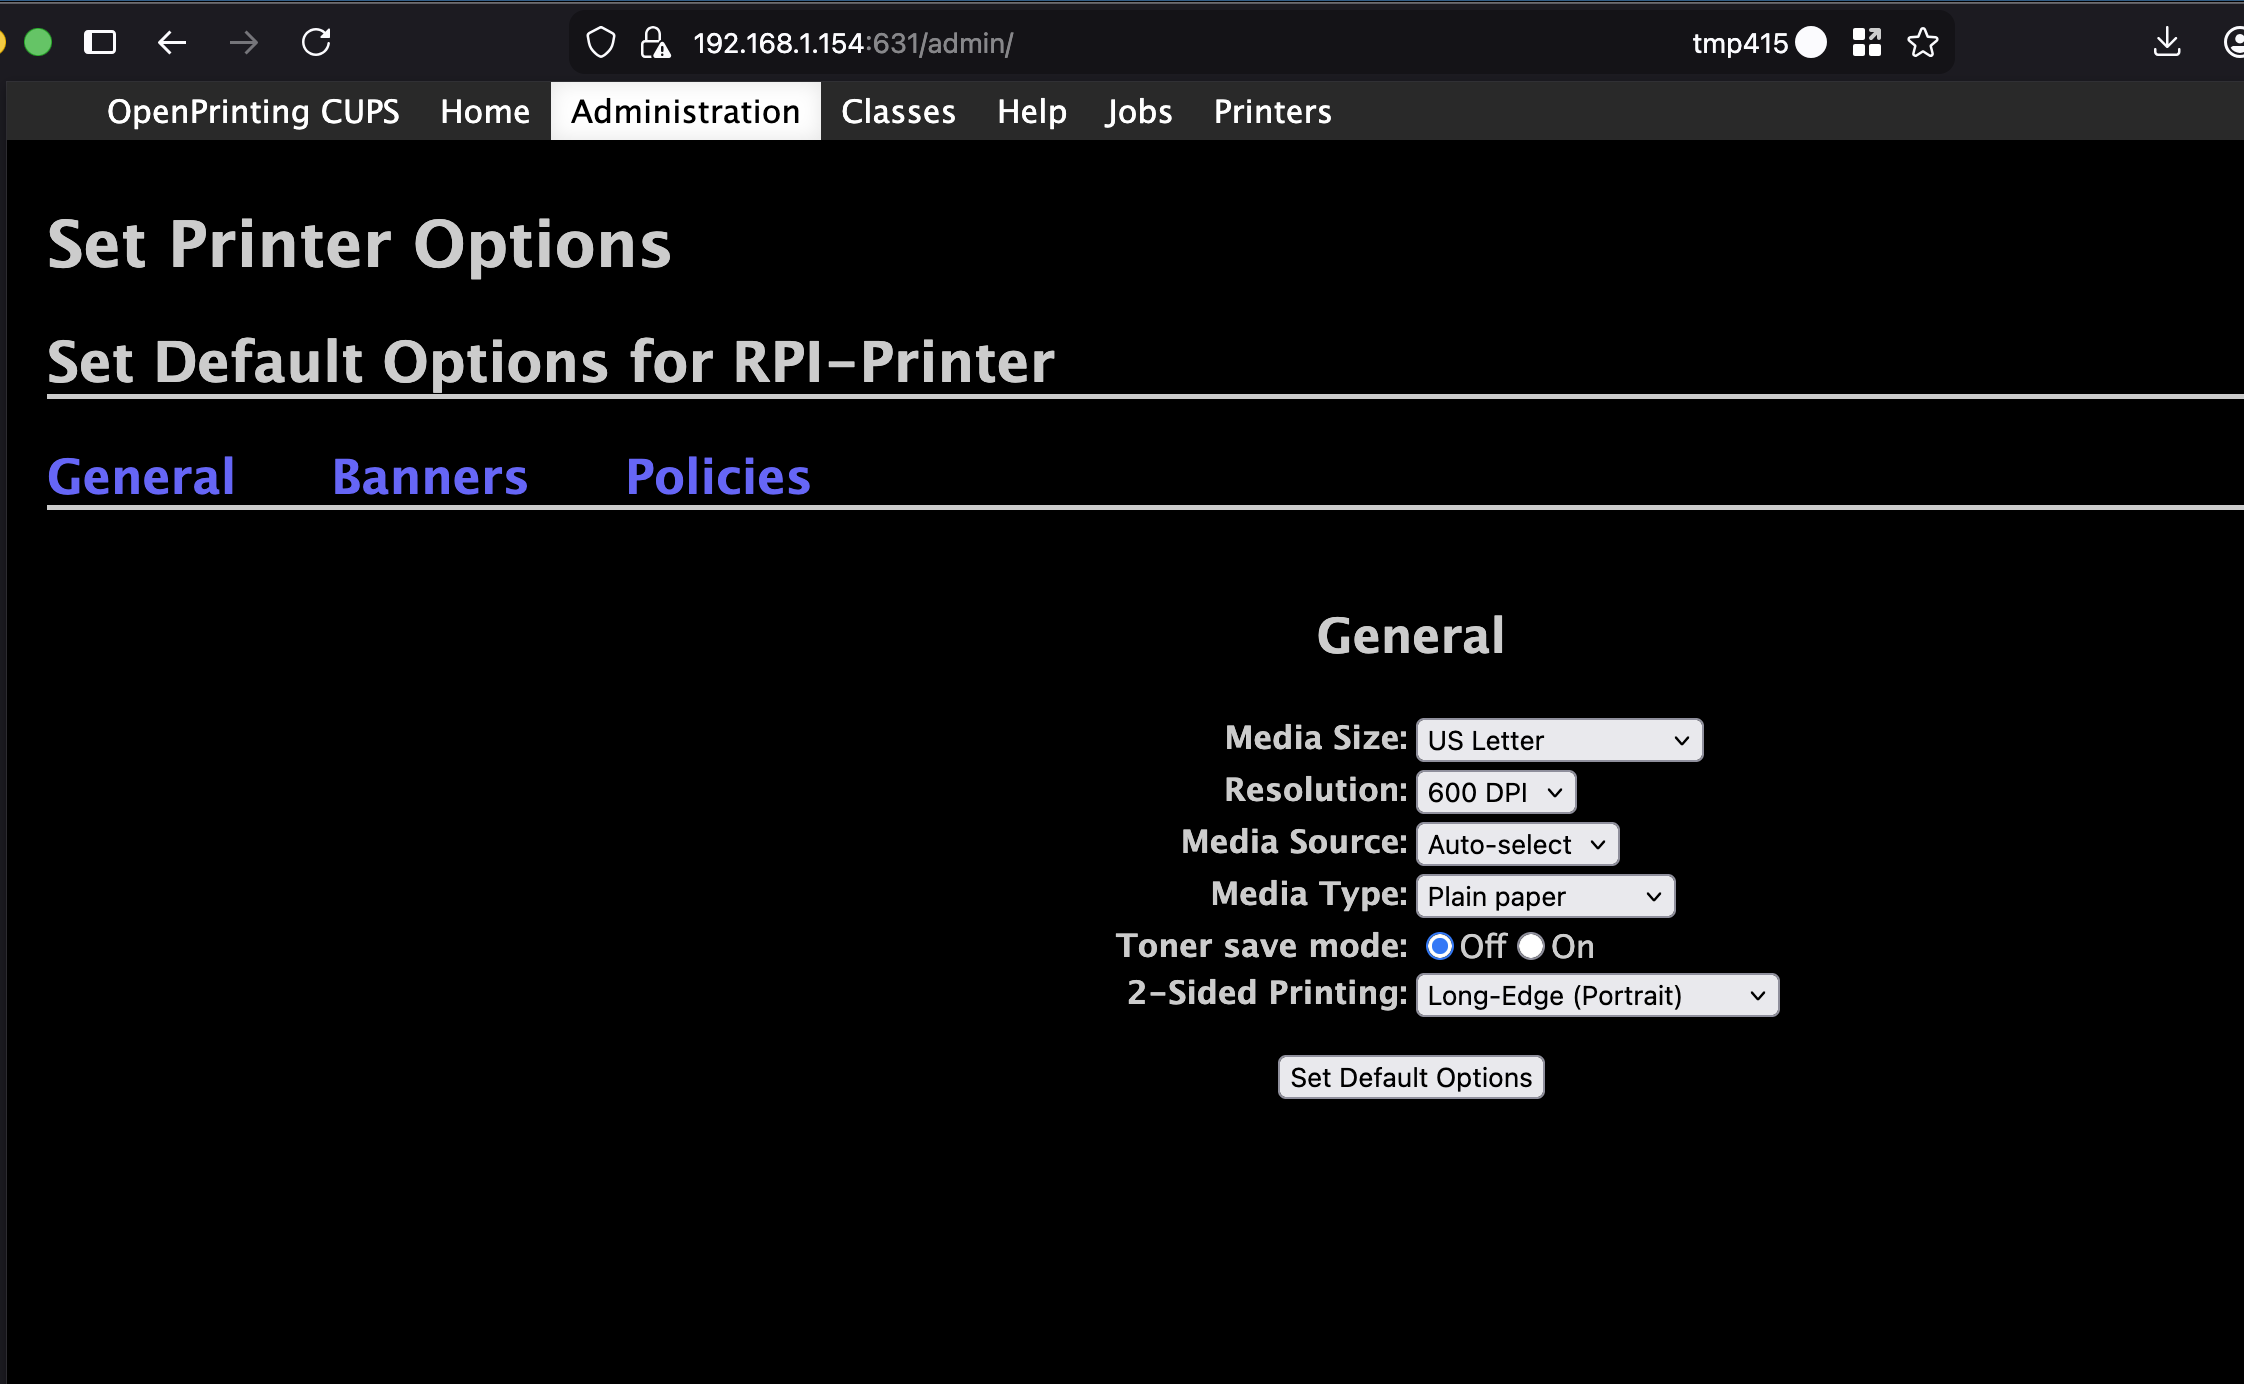
Then, set the default page settings. By default, the printer is configured for double-sided printing on US Letter paper. To change this, go to the printer page, click Set Printer Default Options from the Administration dropdown, and adjust to your liking.
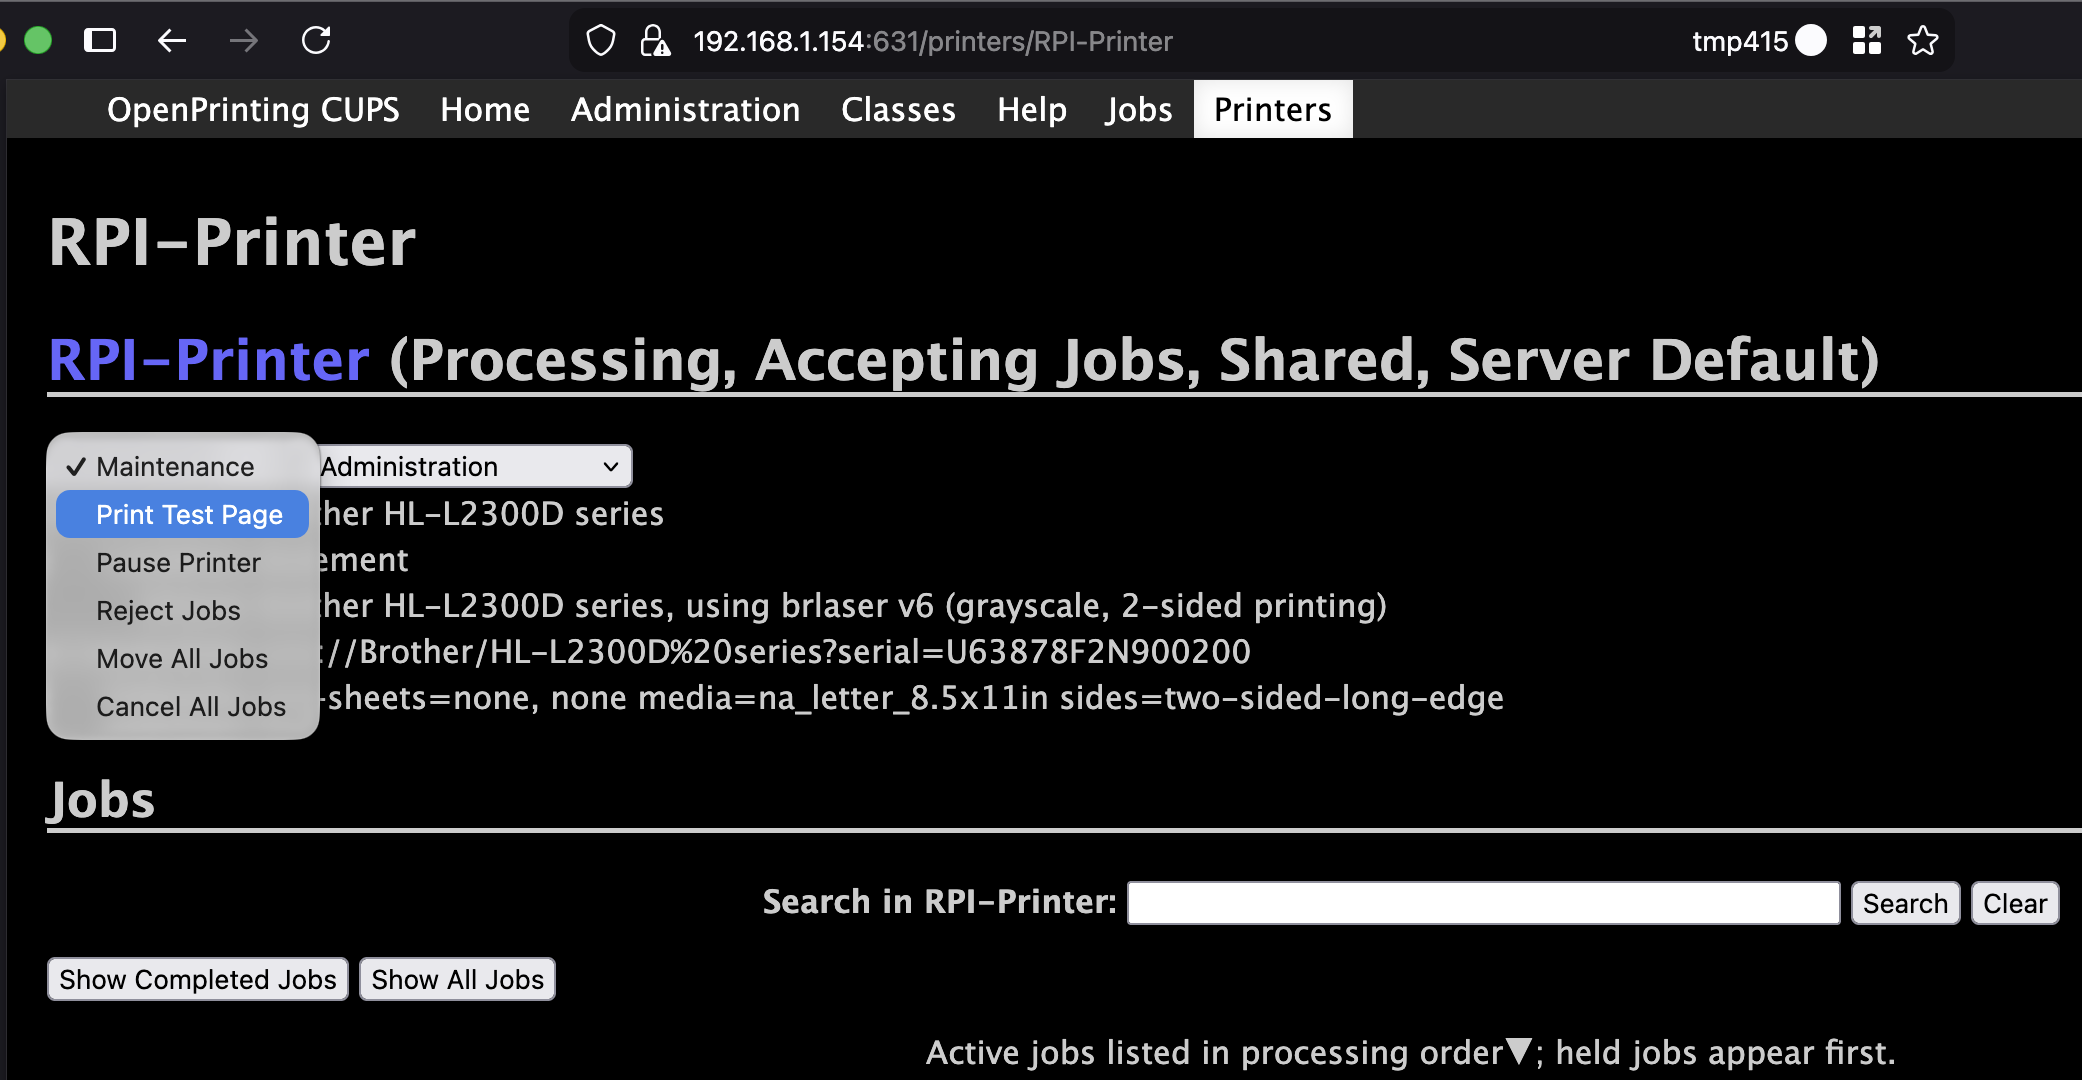
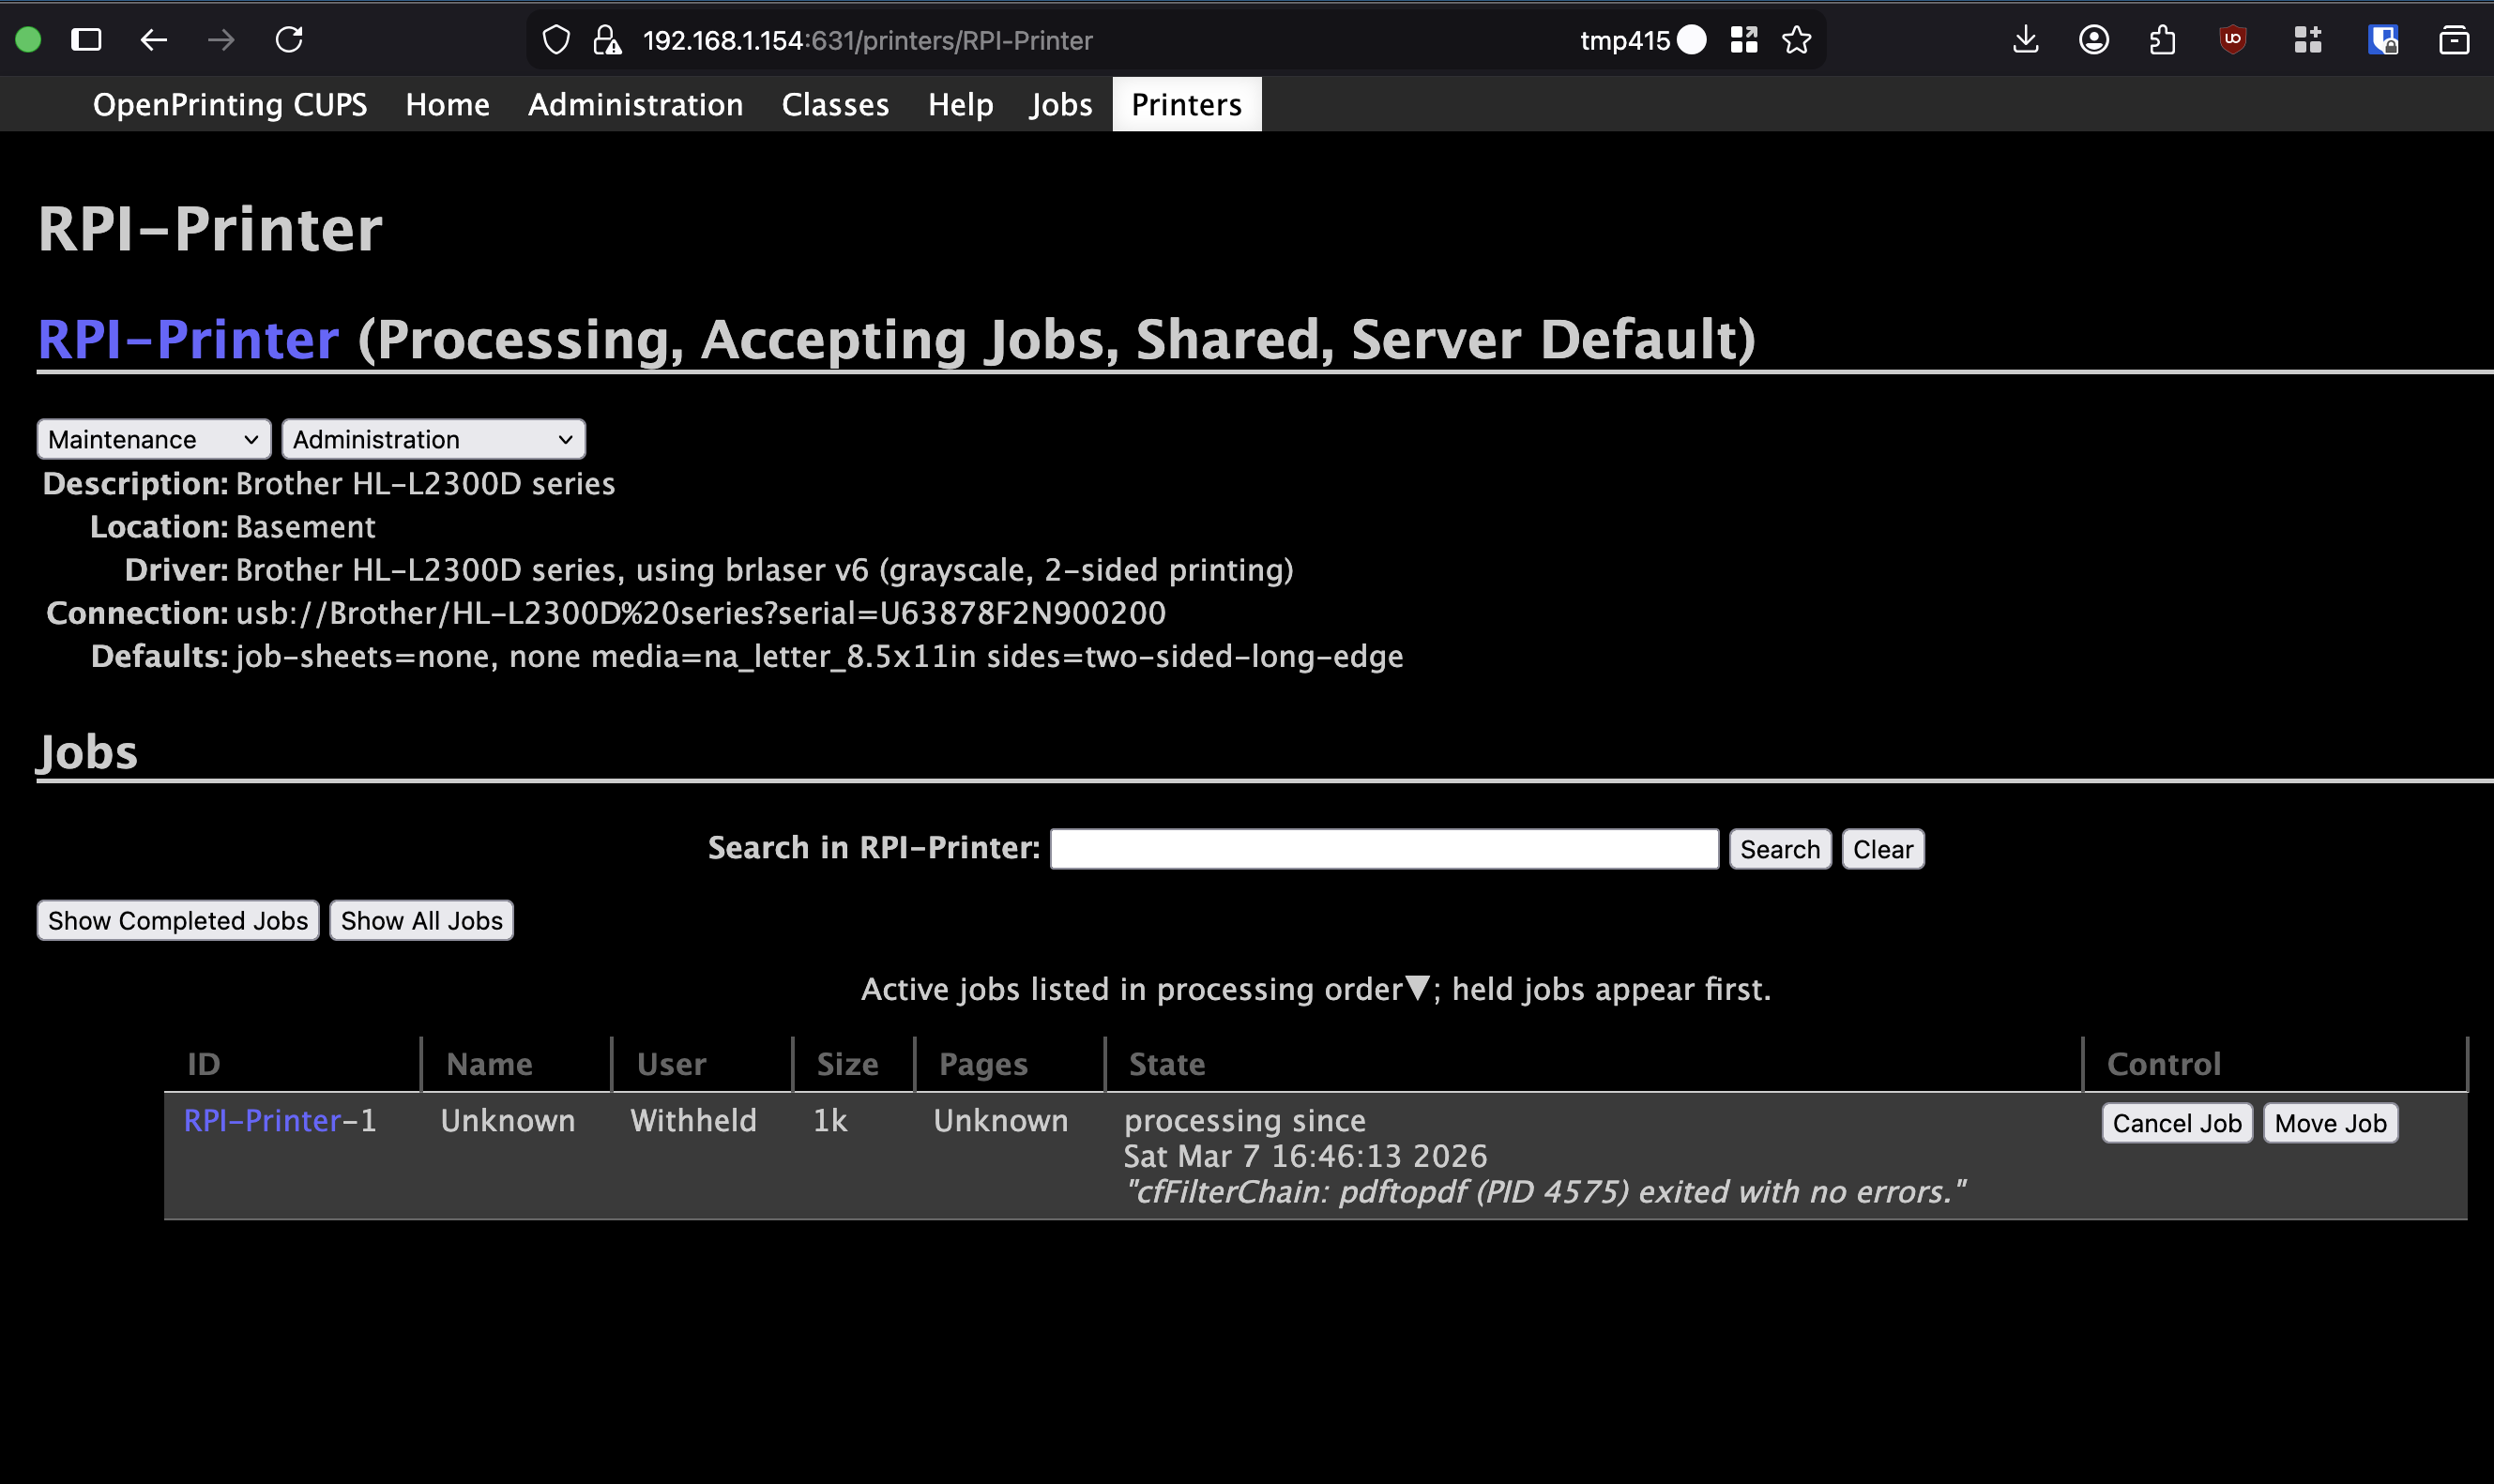
Print a test page to make sure everything works:
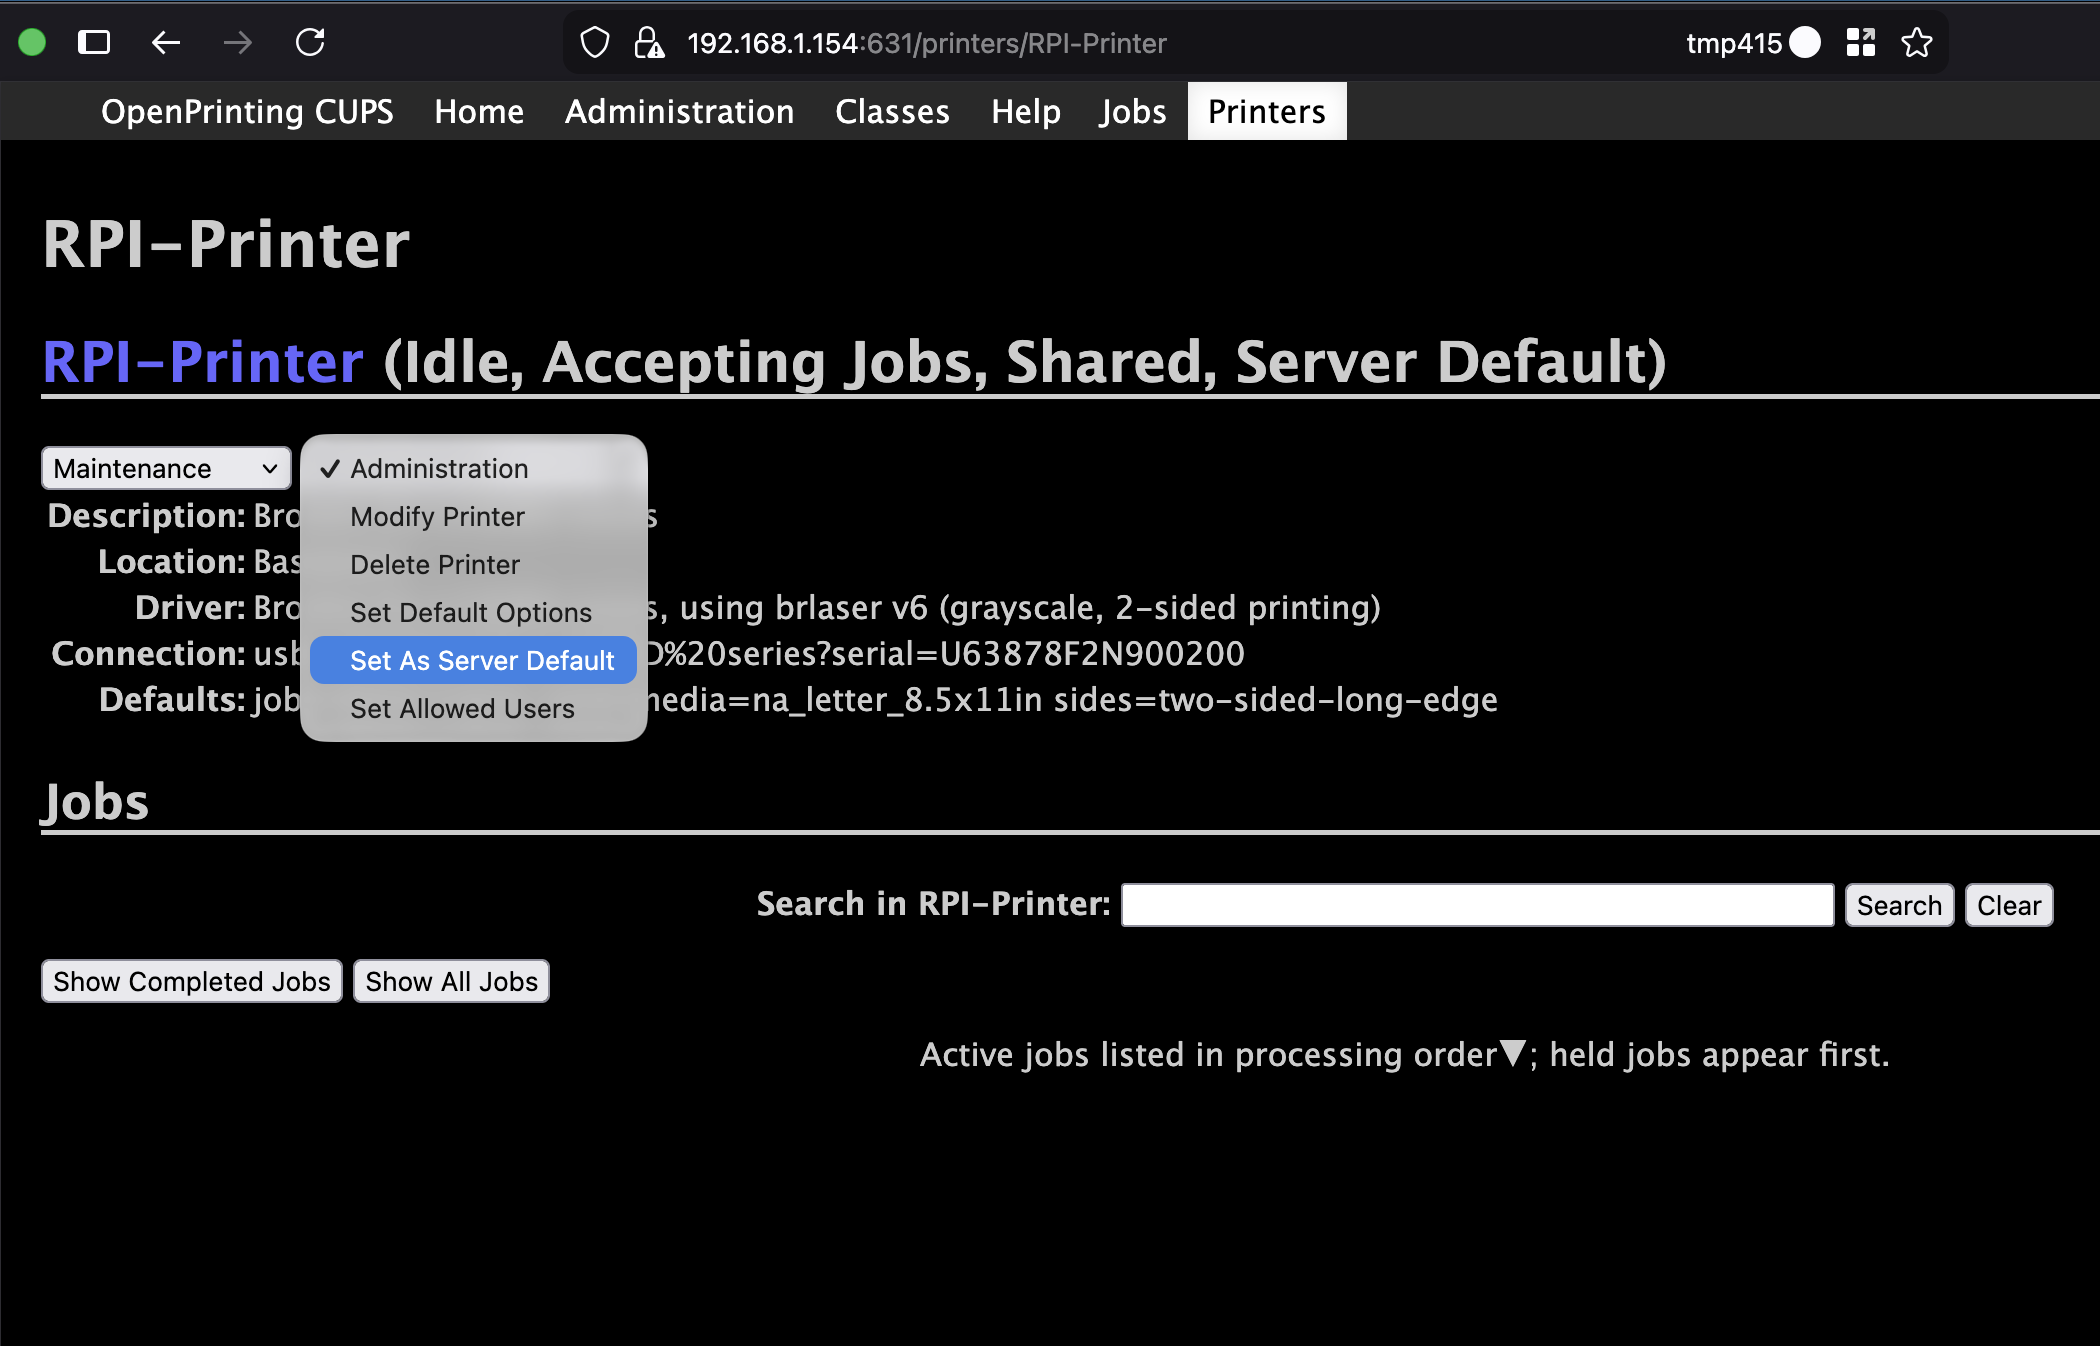
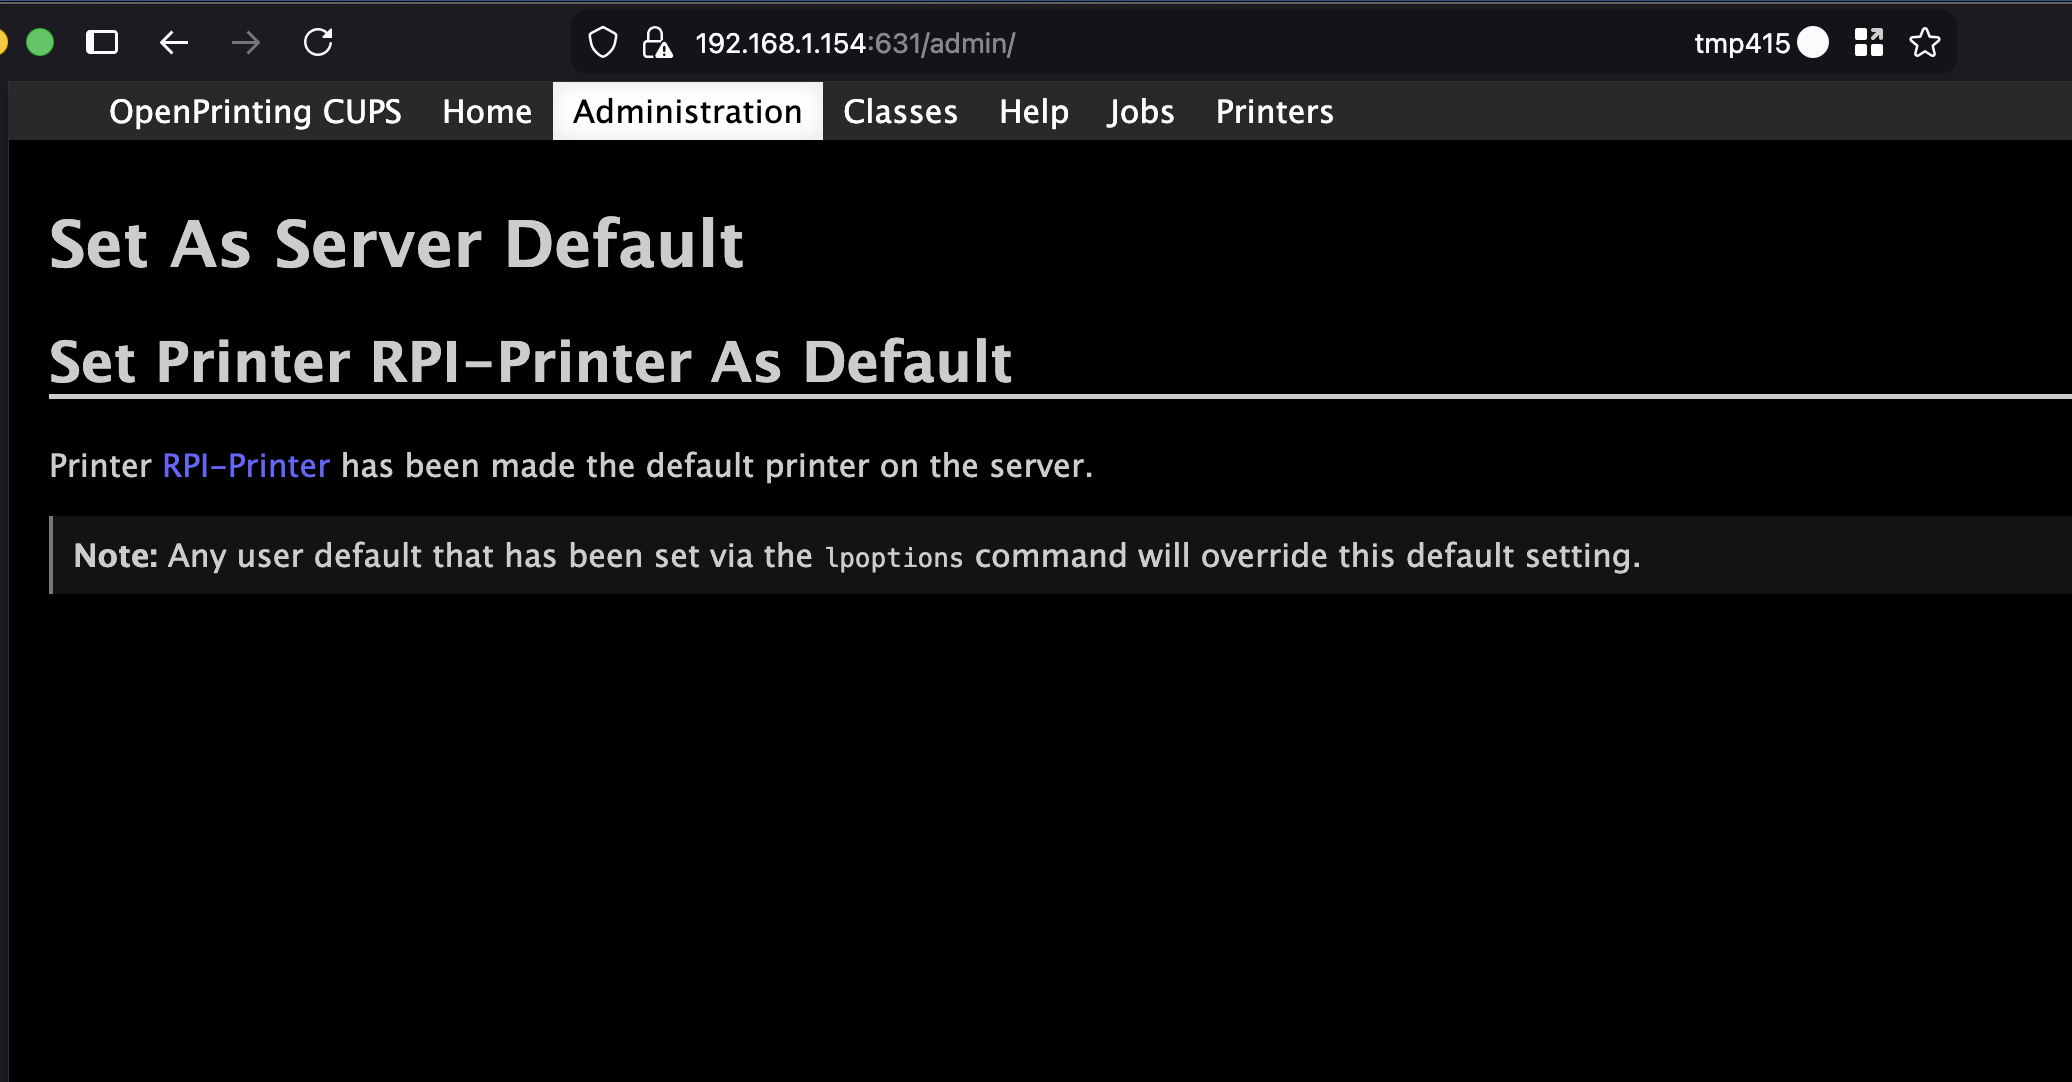
Finally, set this printer as the server default. This isn’t strictly necessary, but it’s a good practice:
Step 6: Enable Network Discovery with Avahi§
This is the magic step. Avahi broadcasts your printer over Bonjour, so it shows up automatically on Macs, iPhones, and anything else that supports AirPrint or Bonjour. There’s no drivers or special software necessary.
First, set a recognizable hostname so the printer shows up with a friendly name:
sudo vim /etc/hostname
# Change to: rpi-printer

sudo hostname rpi-printer
Logout and log back in for the hostname change to take effect.
Then install Avahi:
sudo apt install avahi-daemon
sudo systemctl start avahi-daemon
sudo systemctl enable avahi-daemon
That’s it. The printer will now appear on your network as something like
Brother HL-L2300D series @ rpi-printer.
Step 7: Connect and Print§
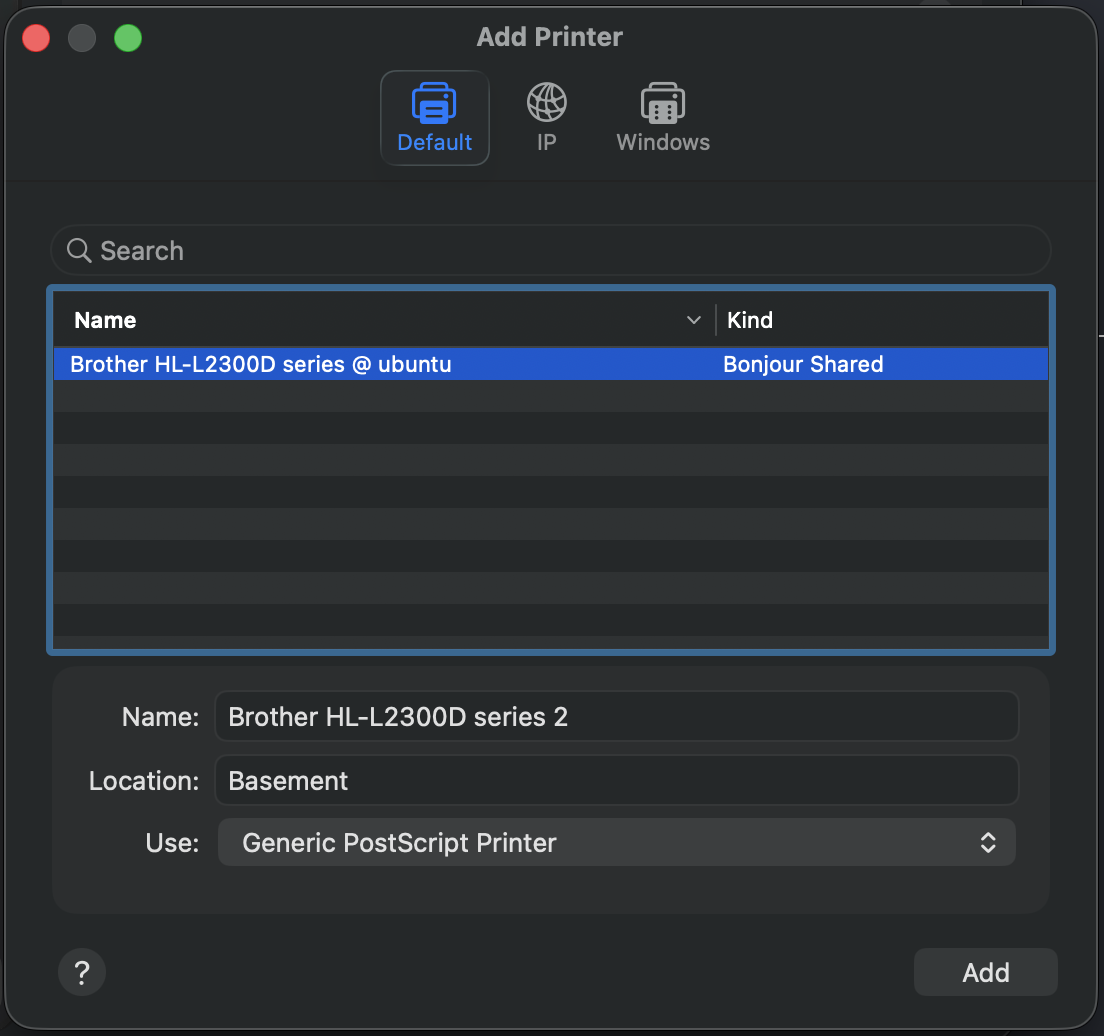
On Mac:
- Open System Settings > Printers & Scanners
- Click Add Printer
- Select
Brother HL-L2300D series @ rpi-printerand click Add - Open a document and print!

On iPhone: No setup required.
- Tap Share on something
- Scroll down and select Print
- Tap Printer and select
Brother HL-L2300D series @ rpi-printer
Conclusion§
After less than an hour of setup, you should have an easy to use and reliable wireless printer. I use velcro-tape to stick the Raspbery Pi on the back of the device and basically forget about it.
For a deluxe setup, you might want to add something that sends an alert if the IP address changes. Or, you can setup something to notify you if toner levels get low.
And really, you have an always on computer now. So, you can also run all kinds of interesting self-hosted stuff on there to solve other home problems.
Here’s to another 2 years of hassle free printing!